Blueprints with Sequencer functionality
I often create props and add extra assets, here I made a light to use in my new short film project. It’s just a prop from the marketplace but I thought I’d show you how with some extra nodes create a floor lamp that can be controlled in the sequencer in a shot.
The reason I make these simple blueprints is twofold, the first is that it makes moving assets around much easier as you move only one thing, the lamp in this case, and two, is that I get a little more into creating blueprints which pushes the learning. All we need to do here is to create an Actor Blueprint and add in the assets we need, here its a floor lamp static mesh, and a rectangle light.
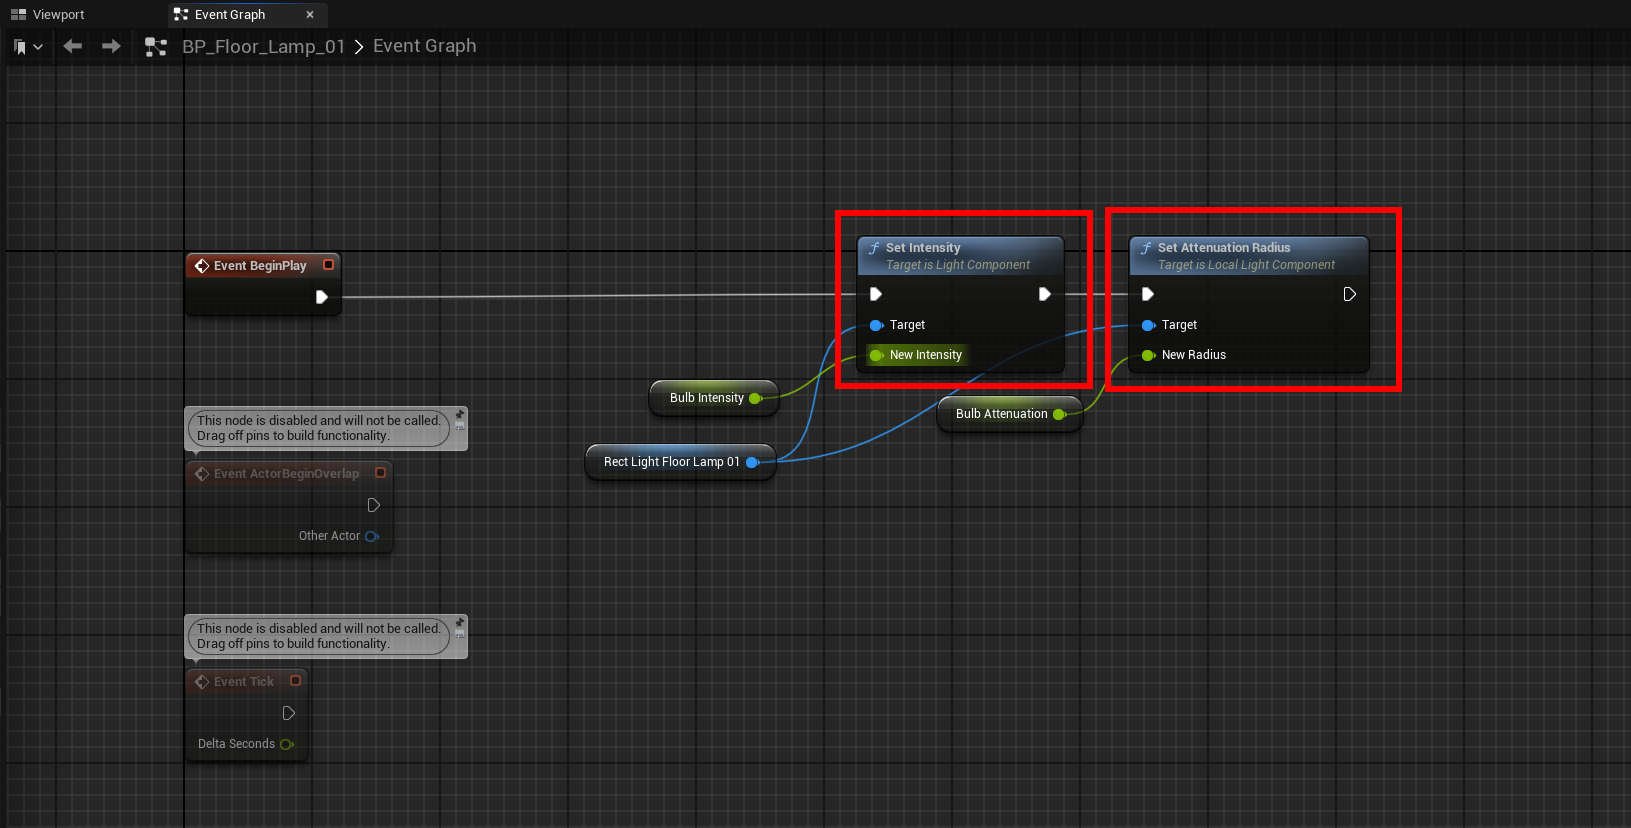
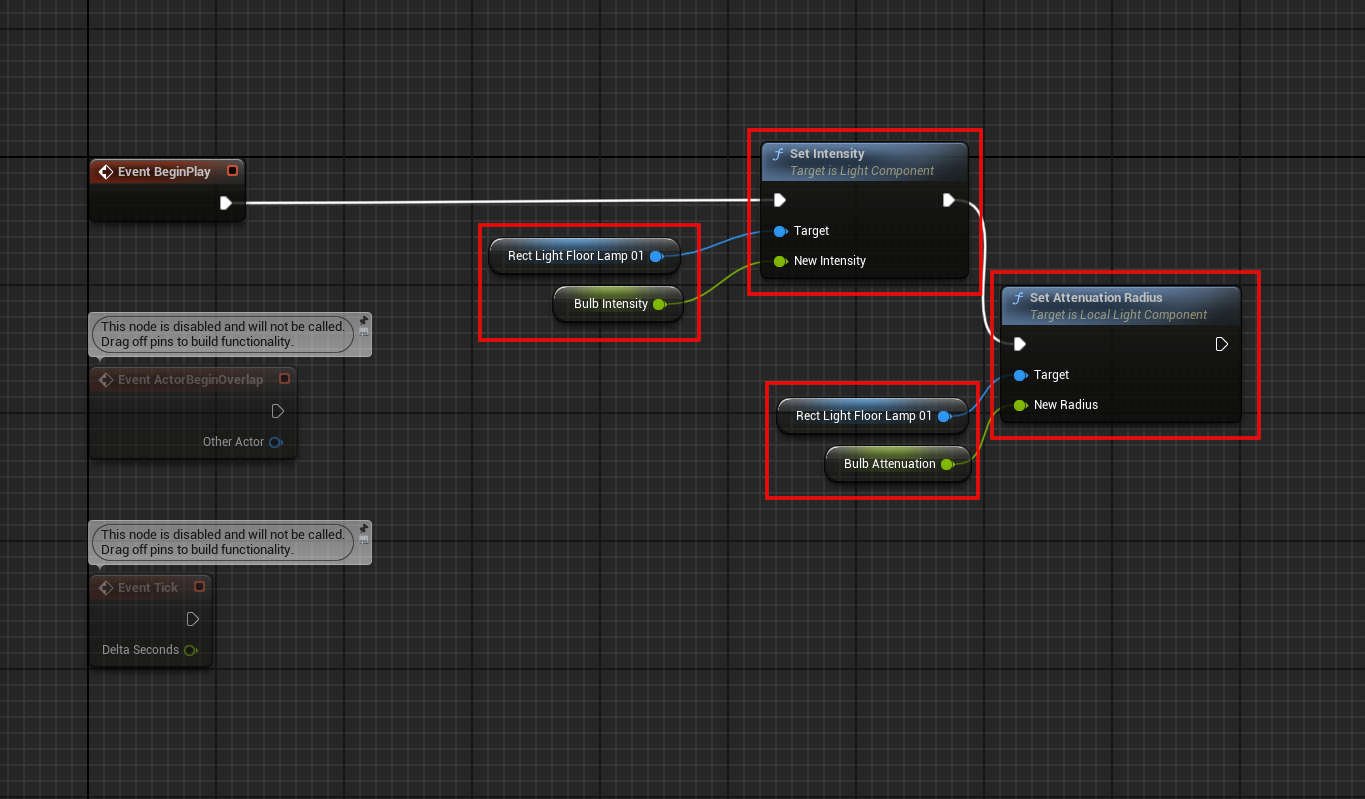
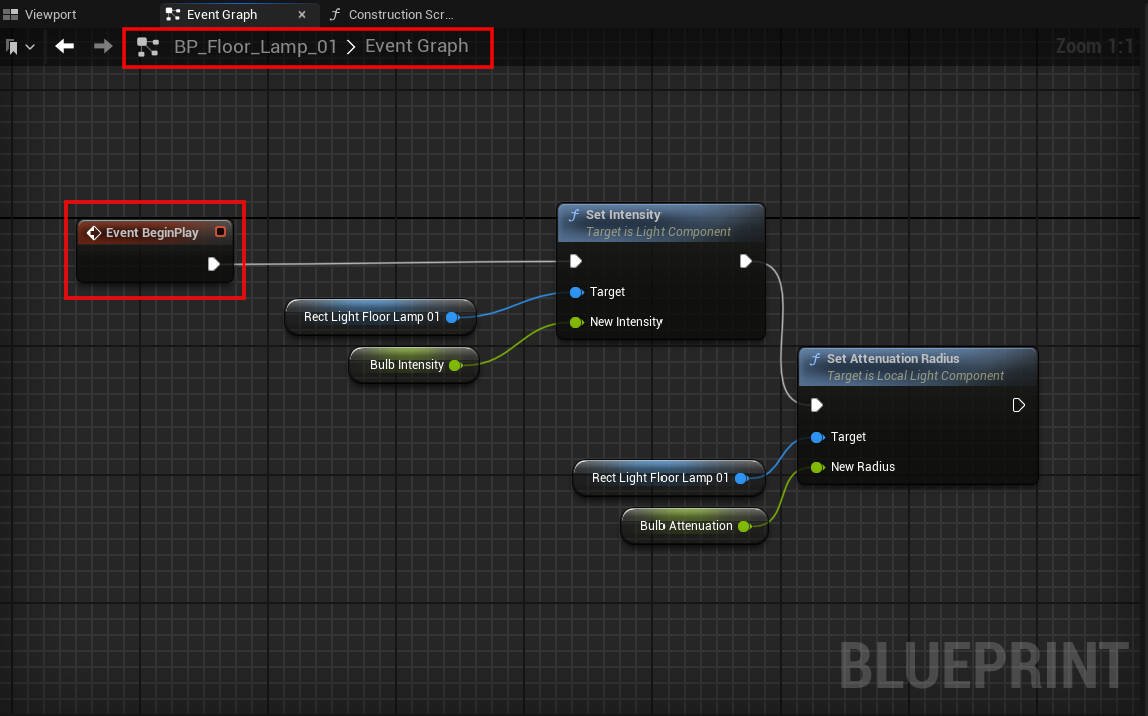
In the Event Graph, drop down a Set Intensity and a Set Attenuation Radius. I assumed I’d need to tweak the intensity value in the shot and the attenuation value might also help, this was also to try out making a blueprint in the first place and these are often the values I go to when tweaking the light in the shot. You will also need the object you want to drive, so drag in your light. Here it’s Rect Light Floor Lamp 01. You can connect up your nodes in a few ways, so feel free to experiment.
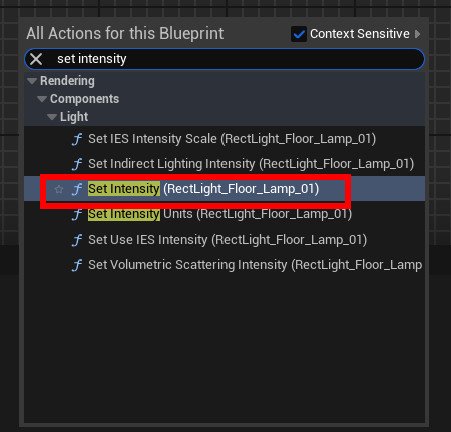
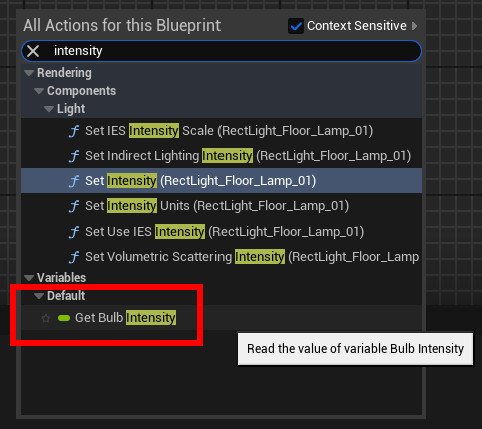
These are the settings you need to look for. The Set Intensity will tell the blueprint what to set and the Bulb Intensity will drive the new value. If you drop down a Set node, for example here we are using Set Intensity, it will also add in the light node and hook it up for you, handy. All we need to do is connect them up, the Bulb Intensity will be connected to the New Intensity with a variable node. You may need to right-click on the New Intensity input to find the correct variable.
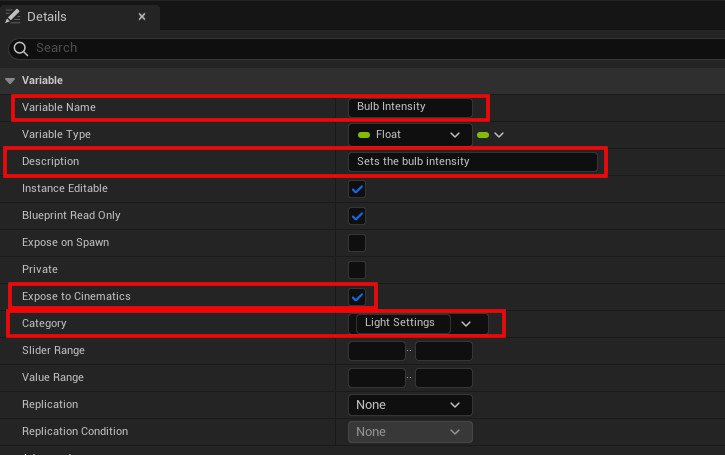
In the Details panel on the Intensity, you can name the variable, add in a Description which is essentially a tooltip and to allow these settings to be accessible in the sequencer, check Expose to Cinematics. If you don’t check it, the blueprint will still work but you won’t be able to modify the settings. You can use the Category to group your new settings and it will make the details panel and sequencer cleaner. Make sure you save and compile the blueprint, these can be found at the top of the window.
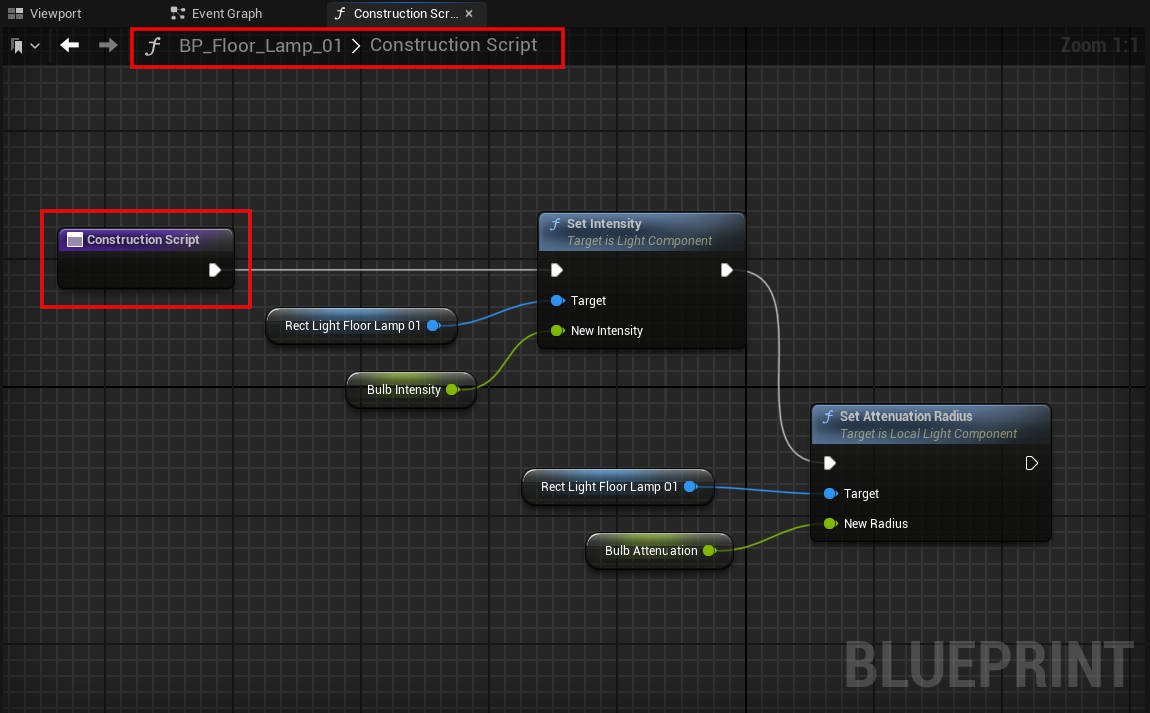
Before we finalise the blueprint we need to make sure we have both the Event Graph and the Construction Script setup. You can copy your nodes from one to the other for this as the build is simple. If you don’t build a Construction Script you won’t be able to see the changes in the level, so your blueprint may be broken.
Before using the Blueprint in the sequencer, we must check the Class Settings and turn on Run Construction Script in Sequencer. This will ensureour Blueprint updates in real time, so we can play with the settings and see them in the scene.
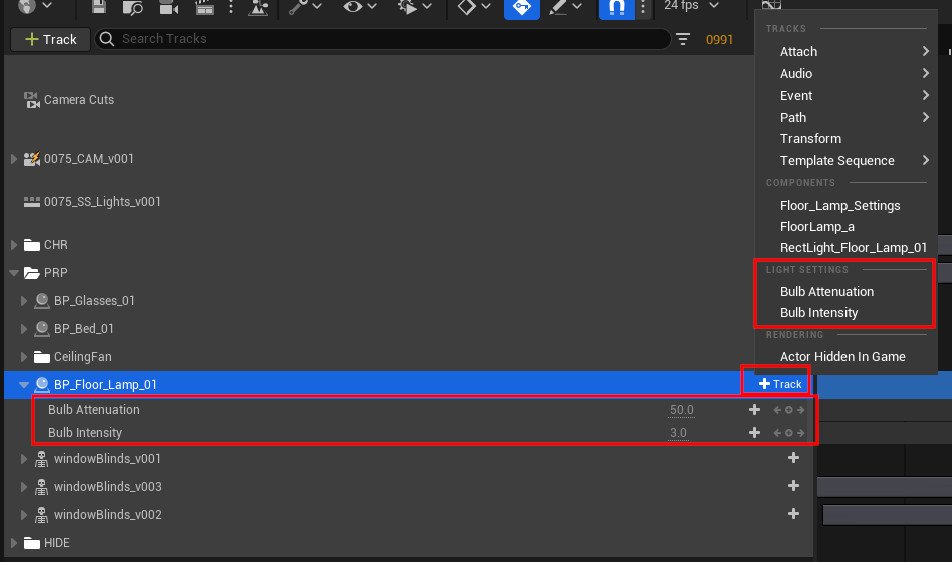
Finally, we can check if everything has complied correctly. Add the blueprint to the sequencer and use the +Track option to add in your custom variables. You’ll see the attributes, neatly contained under Light Settings. Now the light settings are available in the sequencer you can animate the values, which is useful if you want the light to slowly turn off or to flicker.


